How to Add Contacts Manually?
In this article, we’ll go through the exact steps to create a new Contact manually from the WANotifier interface.

Follow the steps below to add a contact manually:
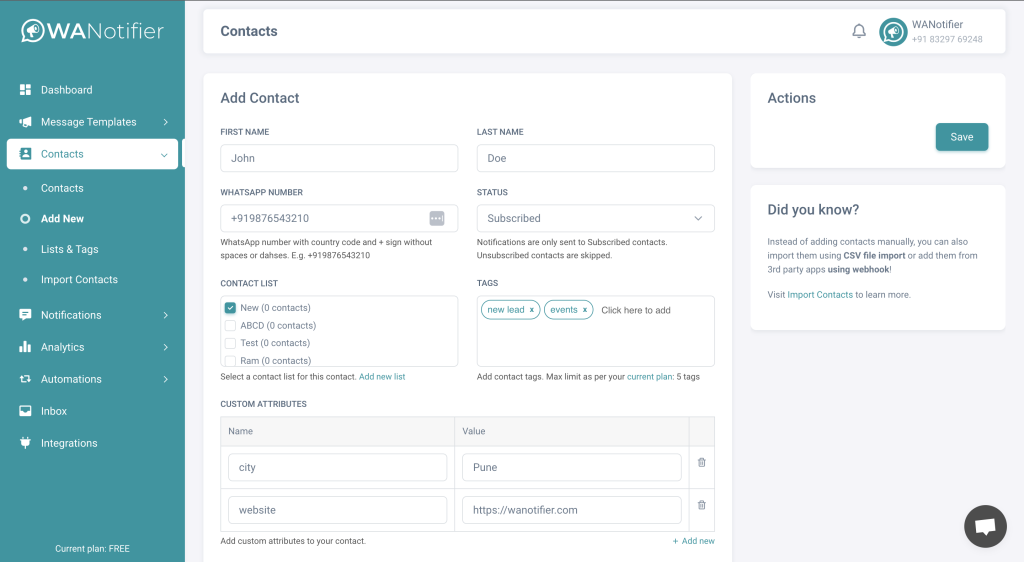
- Open Contacts > Add New page from the left sidebar in the WANotifier dashboard.
- On the page you’ll see multiple form fields where you can enter details about your contact:
- First Name – Enter first name of the contact.
- Last Name – Enter last name of the contact.
- WhatsApp Number – Enter WhatsApp number of the contact. Make sure the phone number is added with country code in this format: +919876543210.
- Status – Select whether the contact would be Subscribed or Unsubscribed from the notifications you send. The notification gets sent only to the contacts that are Subscribed and are skipped for the contacts with Unsubscribed status.
- Contact List – Select a contact list where you want to save this contact. If you do not see any lists, you can click on Add new list to add one.
- Tags – Add tags for the contact.
- Custom Attributes – Add custom attributes to the contact like website\_url, city, state, date\_of\_birth and any other information that you want to store for the contact. You can click on the Add new button to add more custom attributes.
- After you’re adding all the details, click on the Save button in the sidebar and that’ll save the contact.
This is how you can add contacts manually. If you want to bulk import contacts you can import them by uploading a CSV file.
Updated on: 12/07/2023
Thank you!